Managing Payments
Simple Asset Manager has partnered with Dwolla to process ACH transactions - focusing on built-in compliance, security infrastructure and an innovative integration ensuring that Simple Asset Manager never stores sensitive banking details.
Account Details#
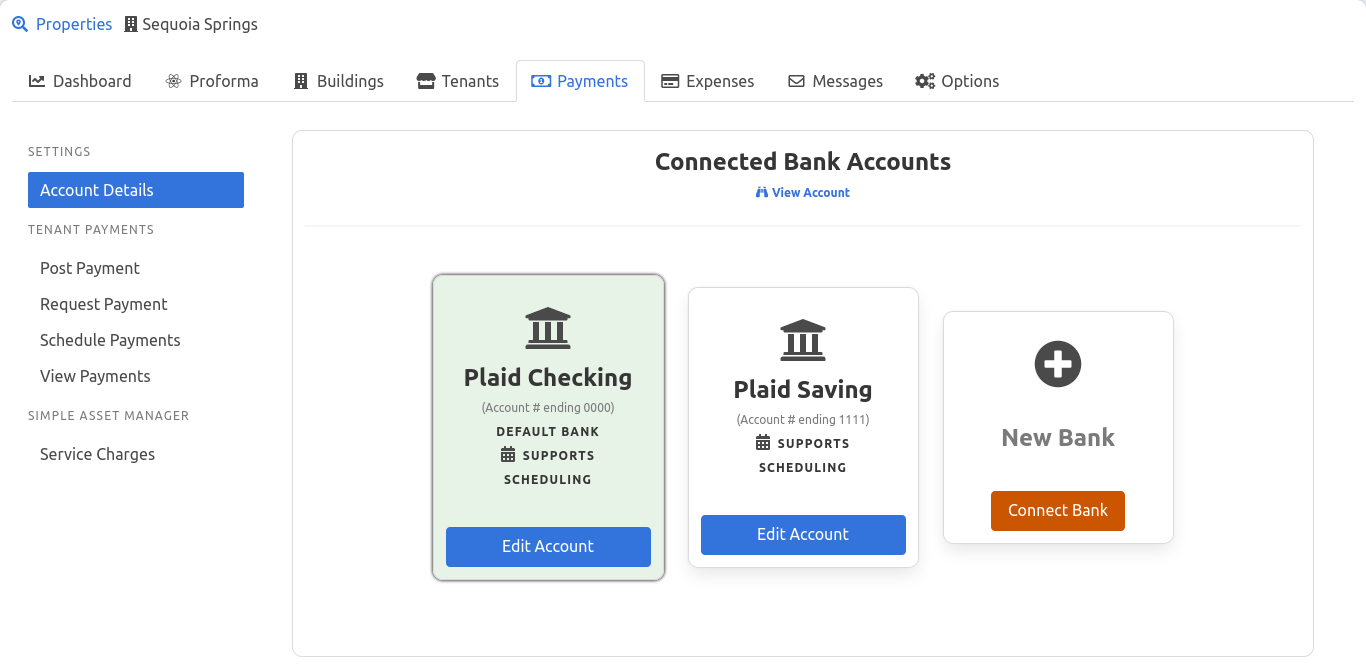
The Account Details section lists active accounts and allows users to add new accounts. Click the "Connect Bank" button on the card labeled "New Bank" to begin the process of adding a bank account.
Add a Bank Account#
After selecting "Connect Bank", Simple Asset Manager will ask a series of Yes or No questions to determine which account type is needed.
Depending on the amount of money transferred per week and whether the account is registered to a Business Entity or Individual determines the information is required.
Once your account is approved and a bank account linked - you may begin charging Tenants and collecting rent entirely online.
note
More broadly known as "Know Your Customer", the purpose of performing this due diligence is to verify the identity of individuals wishing to conduct a financial transaction, while also giving a reasonable understanding of the type of activity in which each customer will engage.
Only the minimum amount of information to satisfy these requirements will be requested.
Click here to learn more about Know Your Customer and the Customer Identification Program
Changing the Default Bank#
The Default Bank receives all payments from Tenants. To update which account is the default:
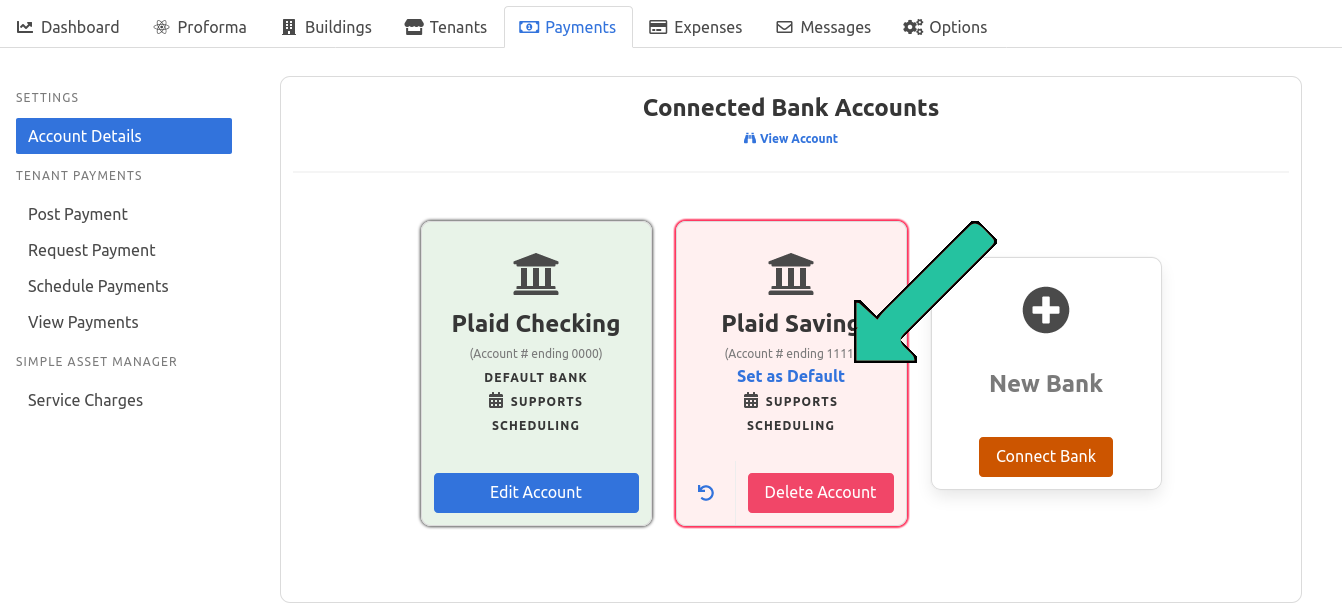
- Click "Edit Account" from the Account Details page on the account to set as default.
- Click "Set as Default".
Only one account may be set to the Default account at any given time. If changing the default account from one bank to another, verify there are no pending transfers before removing the previous account as the Default.
Remove a Bank Account#
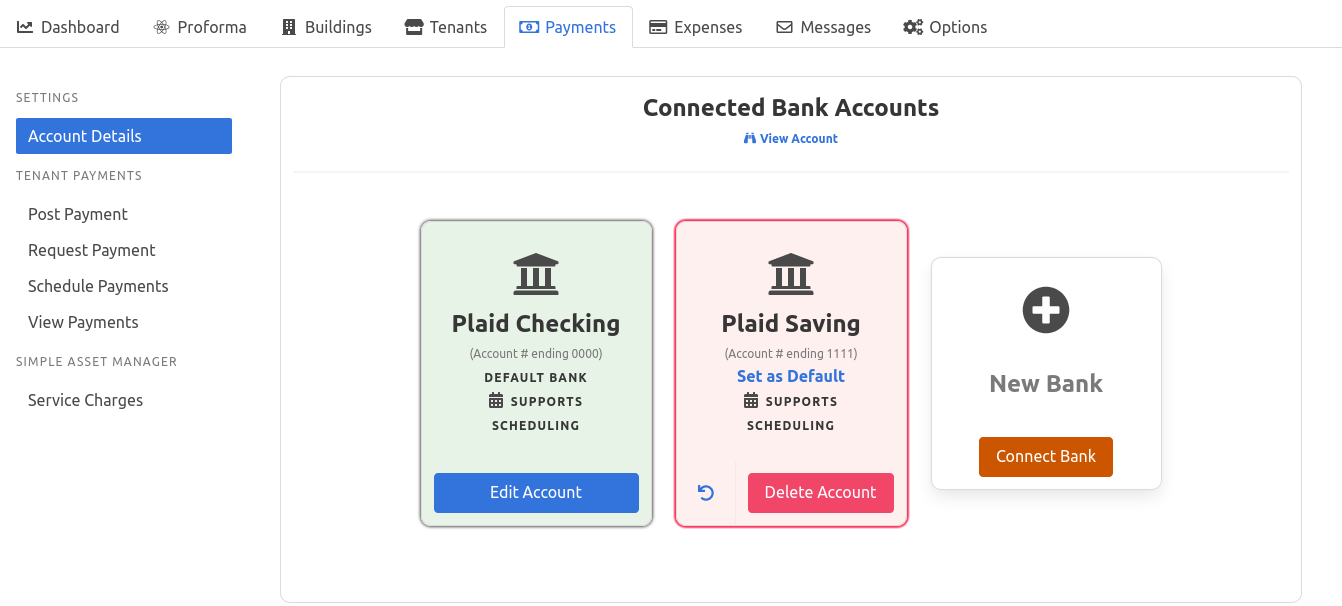
- Click "Edit Account" from the Account Details page on the account to remove.
- Click "Delete Account" to remove the selected account.
This account will no longer be able to receive deposits, and any pending transfers may fail. Before removing an account, verify there are no pending transfers.
Tenant Payments#
A charge can be submitted to any tenant added to the Property. Once a charge has been submitted, its status is easily tracked either through the Dashboard or "View payments" on the sidebar.
note
Tenants that have been Synced have their own Tenant Portal where they can pay rent online.
In addition, once a tenant has been synced you may:
- Upload and share documents, such as Leases, Certificates of Occupancy, Architectural Plans, etc.
- Make maintenance requests, discuss the upcoming farmers market, and discuss anything else that needs discussing with Message
- Provide e-mail notifications to the tenant will receive an e-mail notification and are able to pay their charges online via the Tenant Portal.
Request Payment#
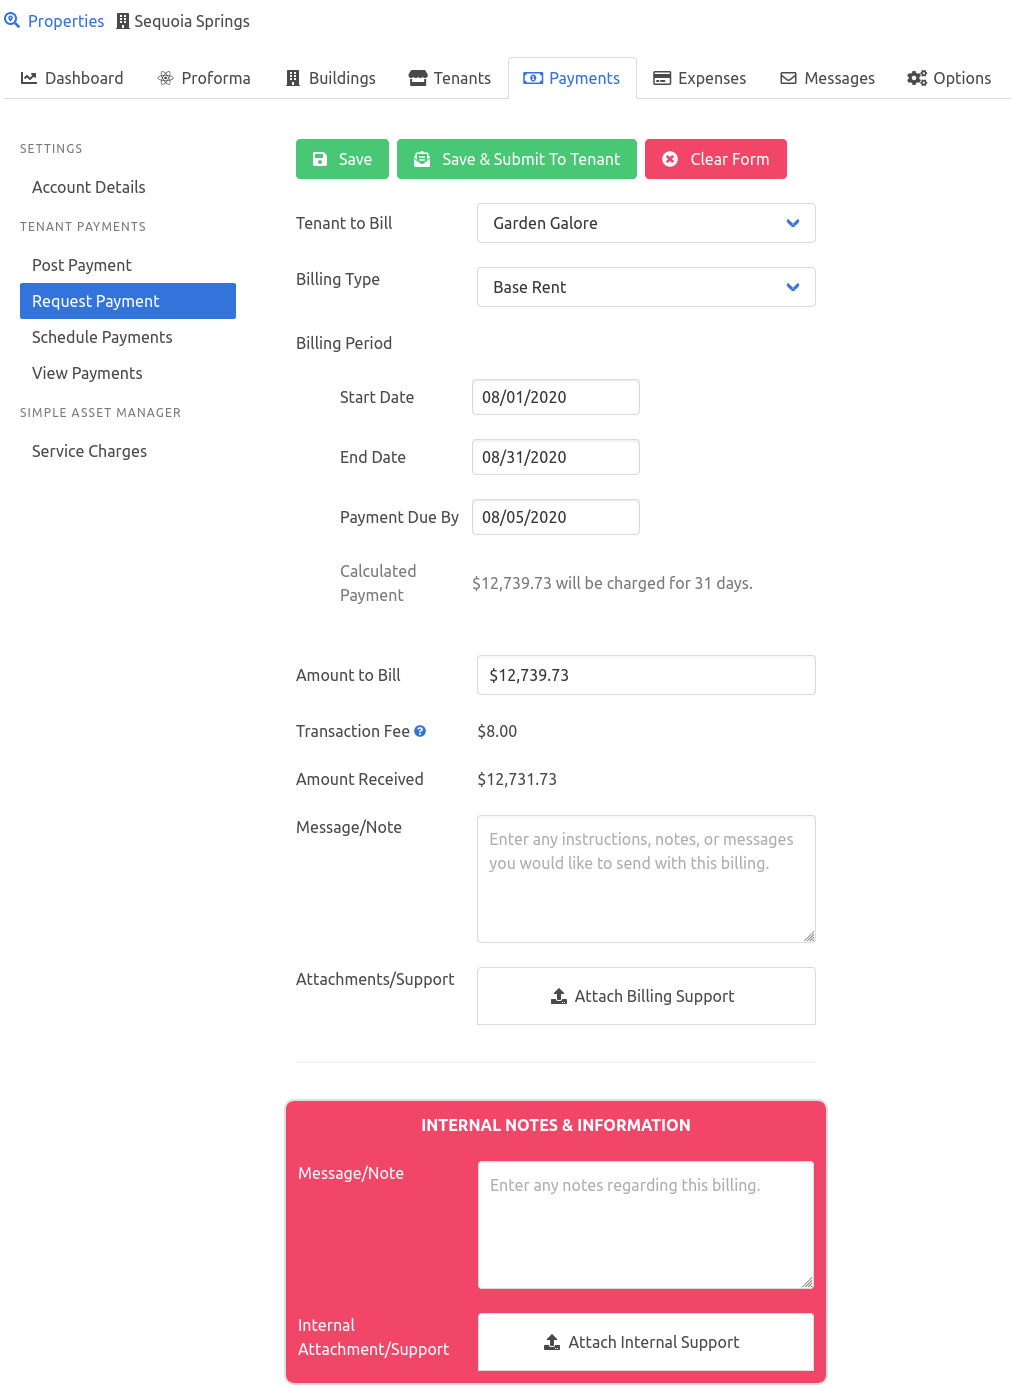
Select "Request Payment" from the sidebar to charge a Tenant.
- Required Information
- Tenant To Bill
- Select from any Tenant added to the Property
- Any Tenant status may be charged - including "Available" suites with no tenant.
This is intentional. For example, if a prospective tenant is contributing towards the costs of an architectural fitout, the charge can be submitted, tracked, and paid all via Simple Asset Manager.
- Any Tenant status may be charged - including "Available" suites with no tenant.
- Select from any Tenant added to the Property
- Billing Type
- Select the type of Charge (Base Rent, Real Estate Taxes, CAM Reconciliation, etc.)
- Billing Period
- Start of Billing Period
- End of Billing Period
- Date Payment Due
- Amount to Bill
- The "Calculated Payment" is provided solely for informational purposes. This calculation is based on the period selected and rent details for that Tenant, which is not necessarily the amount that should be billed.
- Tenant To Bill
- Optional Information
- Message or Note to include with the Charge
- Attachments to include with the Charge
- Internal Notes & Information
- Any notes or attachments entered in this section will not be shared with the Tenant.
Staging vs. Submit Charge#
Once all the information for a Charge has been entered, there are two options:
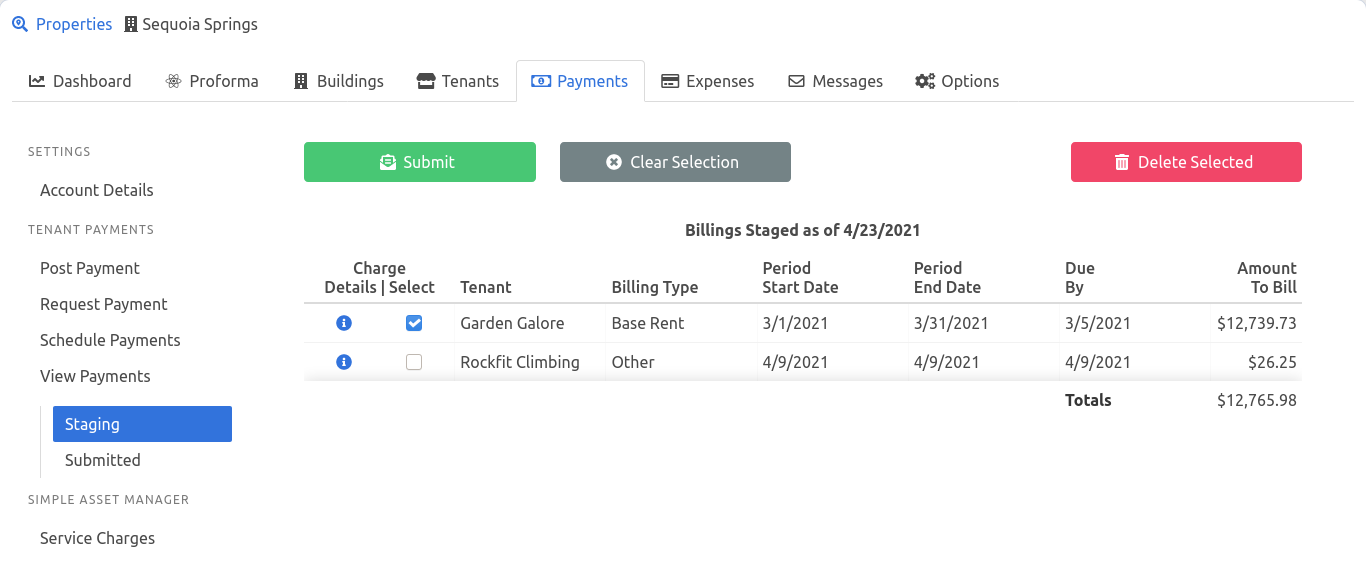
- Save will hold the charge in "Staging" - which can be accessed under "View Payments" in the sidebar.
- Select a single or multiple charges in Staging to either Submit or Delete the selected charges.
- Staging is designed to be a queue for charges that are finalized but require approval or review before submitting to the Tenant.
note
View the details of any charge by clicking the info circle. Once a charge is in Staging, it may not be edited. If a charge is incorrect, delete the charge and create a new one.
- Save & Submit to Tenant moves the charge to "Submitted" and sends an e-mail notification to the Tenant if they are synced.
- Once a charge is submitted, its status can be tracked on the Payments card in the Dashboard and under "View Payments".
Post Payment#
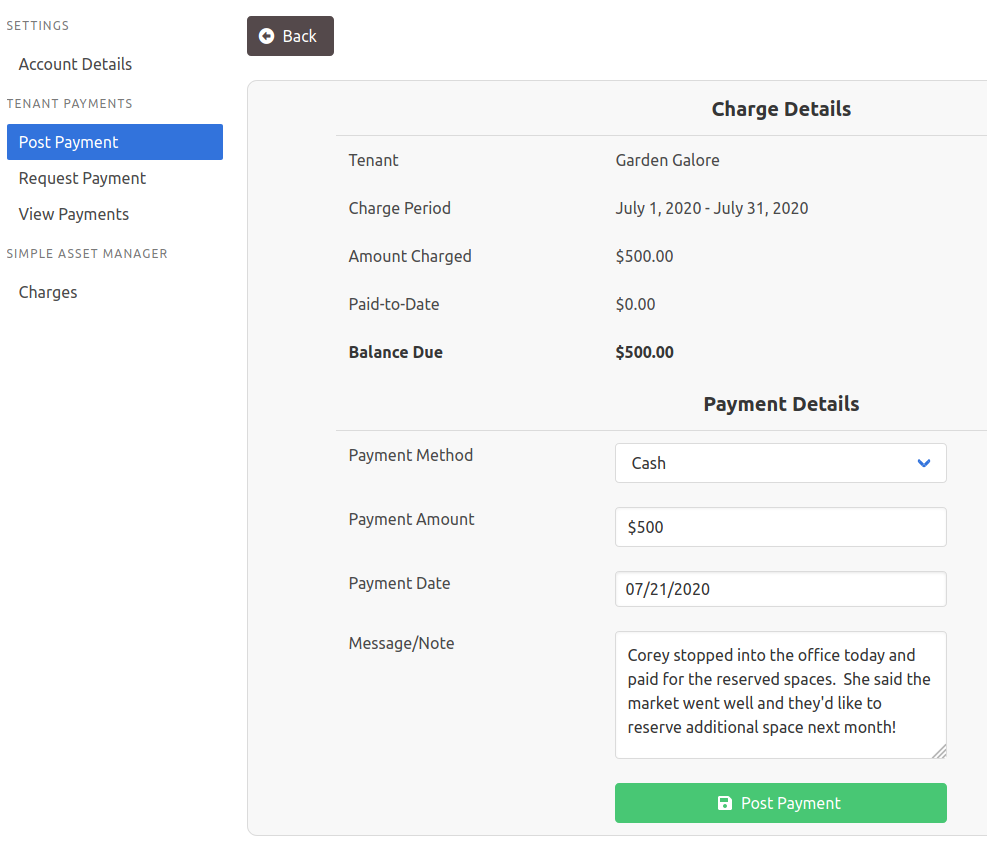
If a Tenant is not synced, or makes a payment via cash or a check - payments can be posted manually for book-keeping purposes.
note
Tenants are able to make payments online through their Tenant Portal by Syncing. Click here to learn how to sync Tenants.
- First, create the charge and click "Save & Submit to Tenant" to move the charge to Submitted.
- Click on "Post Payment" to see a list of all charges that have been submitted. Click on "Post" to select a charge to pay.
- Provide the following payment information:
- Payment Method
- Choose from Cash, Check, or Credit Card
- Payment Amount
- Payment Date
- Payment Note (optional)
- Payment Method
